Differences between primary device/secondary devices and how to exploit them properly
An important feature of Melis is the fact that the server is able to distinguish the device from which you are connecting, and one of them (usually the one in which you create the wallet the first time) is called primary: all the others are secondary devices. In general there are no differences in functionality, but the primary device has a few more possibilities, for example to see all the devices that are connected to the wallet and delete their saved credentials. But the most important feature is that it can be the only device able to access accounts that you can set as "safe". This is a very advanced security feature that allows you to disable access to "important" accounts if your credentials are stolen, or if someone wants to force you to access your wallet. The primary device may not be the one from which a prowler is accessing and from a secondary device there is no way of knowing if it exists or not, and this guarantees plausible deniability.
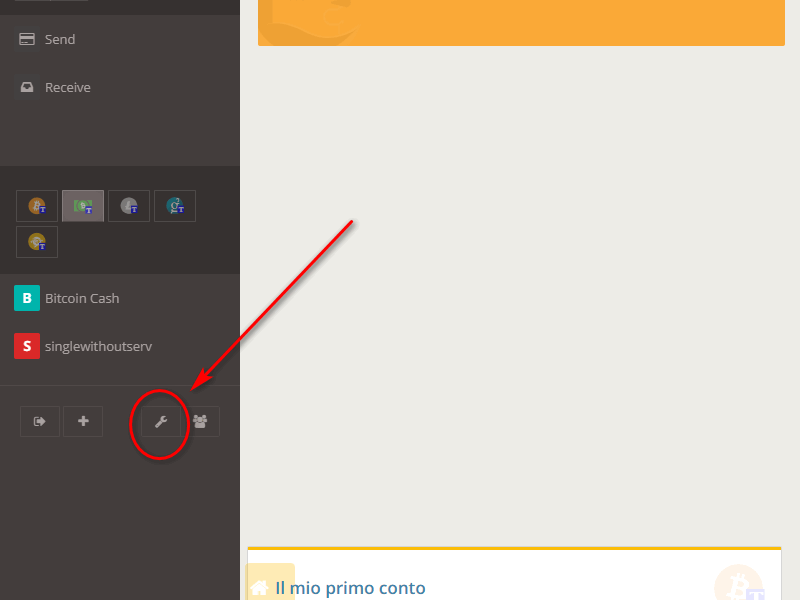
To see if a device is primary, access your Melis wallet and from the Dashboard click on the "wrench" icon.
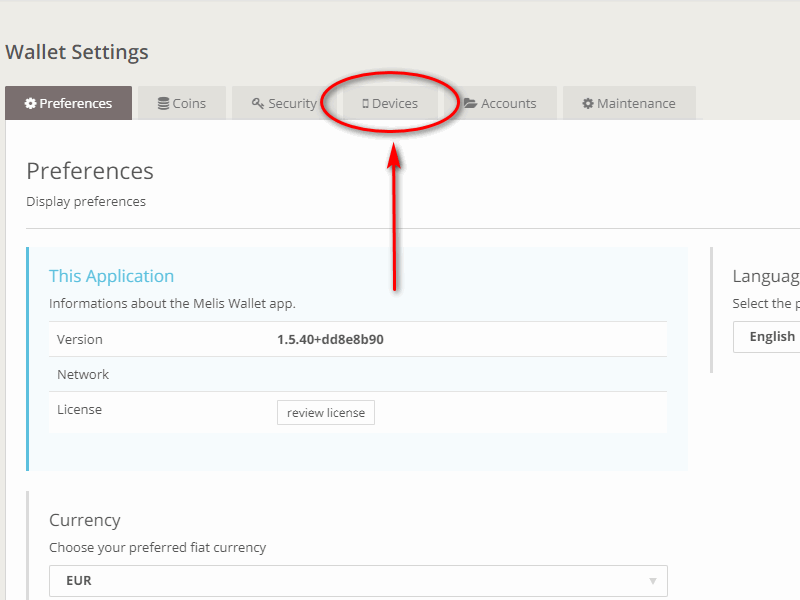
On the "Wallet Settings" page, continue by clicking on the "Devices" tab.
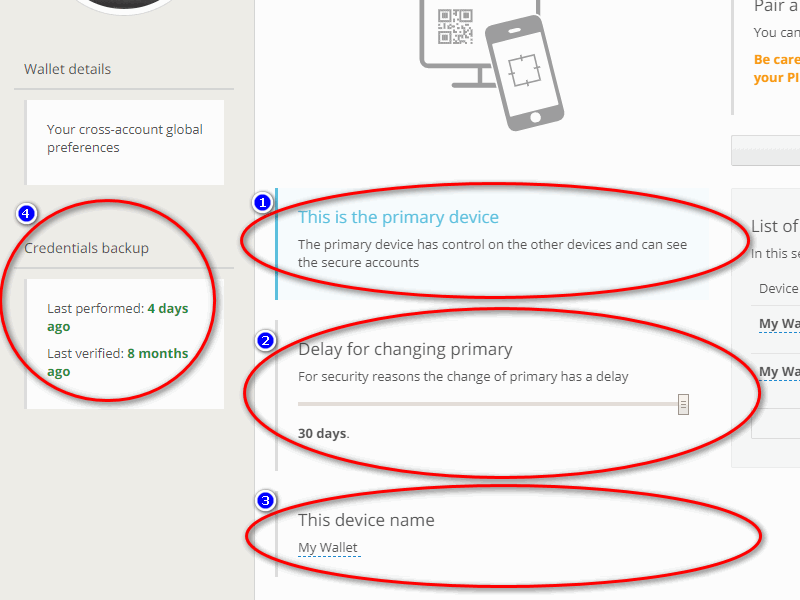
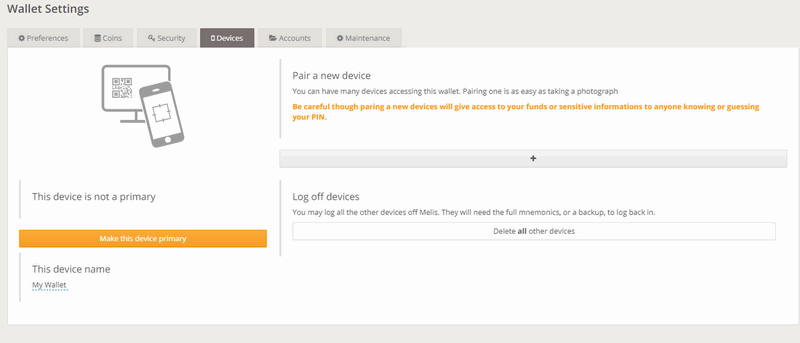
On the left side of the "Devices" page you can see four important areas: 1) If the device you are operating on is primary or not; 2) the time-lapse that must pass if you want to change the primary device or you lose it and you want to promote another one as primary (from 1 to 30 days), this configurable option is only available from the primary device and obviously will not be visible on secondary devices; 3) the name of the device on which you are operating; 4) how much time has passed since the last time the backup was done and how much time has passed since the last time you verified it (How to backup the wallet).
On the right side of the "Devices" page, in the box marked with 1, you notice the possibility to add further devices to the existing ones.
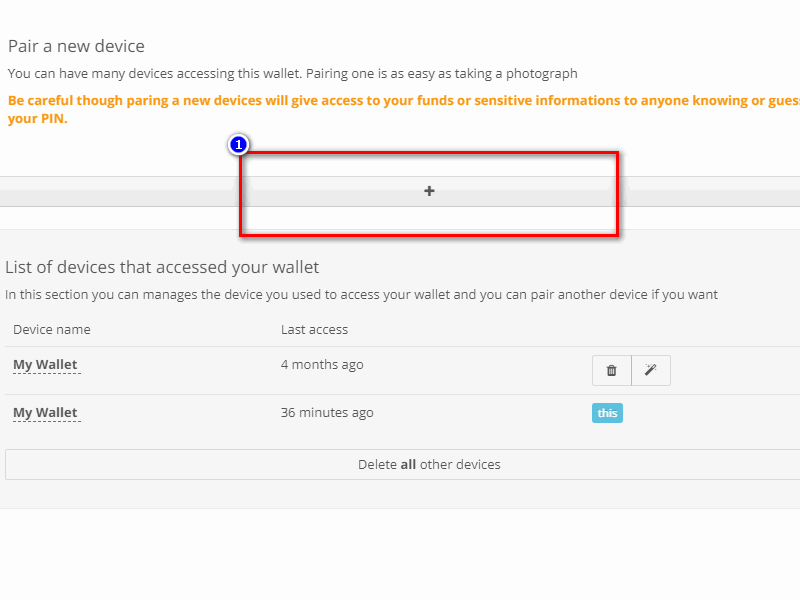
If you want to add a new device, just click on the "+" button and follow the guided procedure: this will avoid having to manually enter the credentials by using a QR-code (How to add new devices and delete the ones already existent).
Moreover you can see the presence of another important box, where you find the list of all the devices that can access the wallet. This configurable option is only available from the primary device and obviously will not be visible on secondary devices.
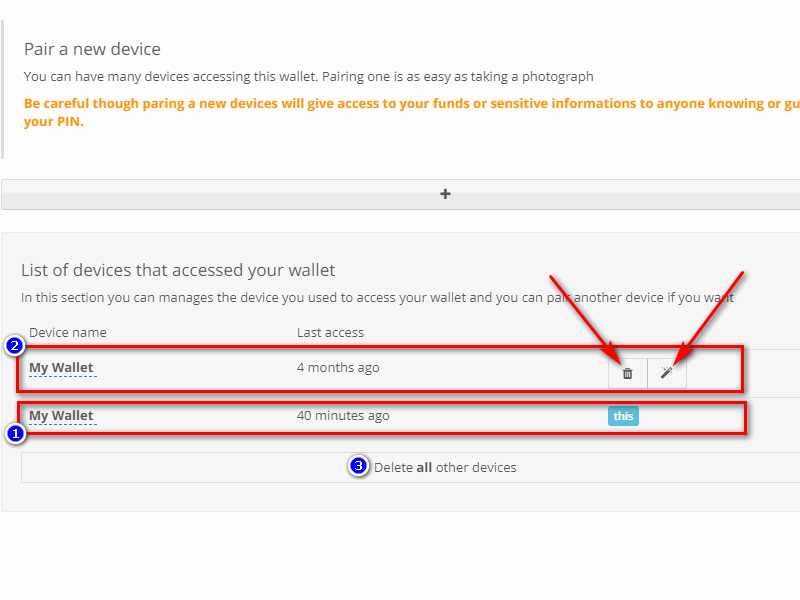
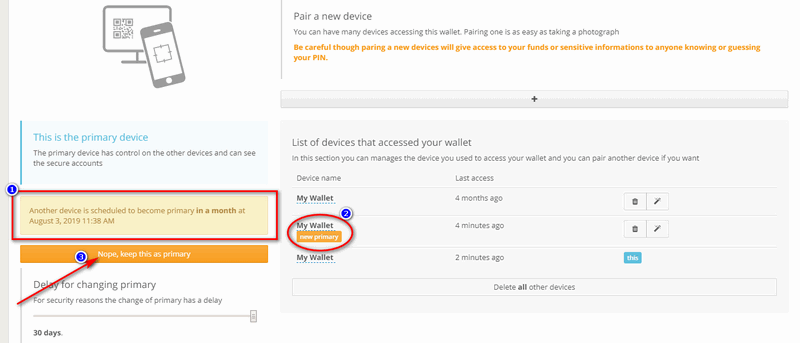
As we can see from the following image, 3 fundamental fields stand out. The first one informs you that the device from which you are operating is the primary one, highlighted by the label "This" in blue. The second one informs you that there is a secondary device that can access the wallet, but only the primary one can see them all and permits to click on the two associated icons: "Delete" and "Make this device the primary". By choosing "Delete", you delete the credentials saved on that device (i.e. it will no longer be possible to log in by simply entering the PIN) and with "Make this device the primary" the selected device will be promoted to primary. The third one allows you to cancel the access from all the other secondary devices and can be used as an emergency system if you fear that someone might have access to one of them and you want to prevent it from guessing the PIN. It can be used in the event of a device being stolen (unless you know exactly which device is in the list) and you didn't assign it a recognizable name.
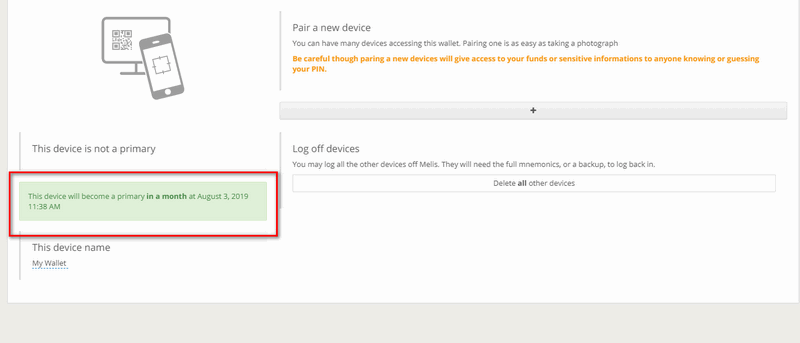
If you access from a secondary device, the same screen seen so far will appear in the following way.
By clicking on the yellow "Make this device the primary" button, you will start the process to change the current secondary device into the primary one and the process will take exactly one month, just because the primary delay bar is set to 30 days by default.
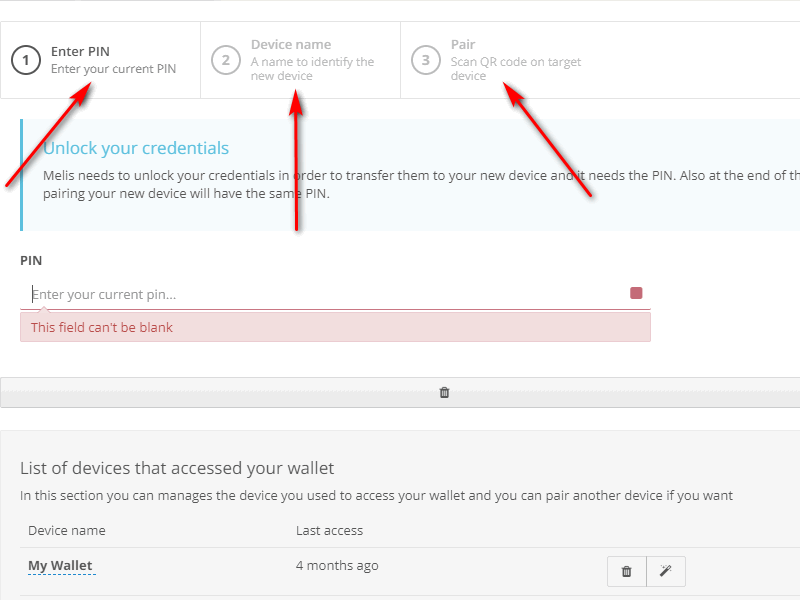
On the primary device you will receive a warning that someone has started the procedures to make a new device primary, as shown in step 1 of the image below. In the list of devices you can see which secondary device will become primary in the following thirty days, as shown in step 2. If the user is unaware of this change and fears a malicious attack, he/she can click on the yellow bar (as shown in step 3) and cancel the procedure.
Selecting the "Accounts" tab, you will notice that each account has two associated clickable buttons. The first is "Hide/show": a function that can be convenient when you have too many accounts and don't want to see someone of them, because otherwise you would fill the screen. For example, on a mobile phone with a small screen, if you only need to act on one account or two, you can hidden all your accounts except those that interest you on that device. At any time you can show them again by clicking on the aforementioned button. It is a function that only changes the display and is a local setting for each device: if you hide some accounts on one device, nothing changes on the other devices.
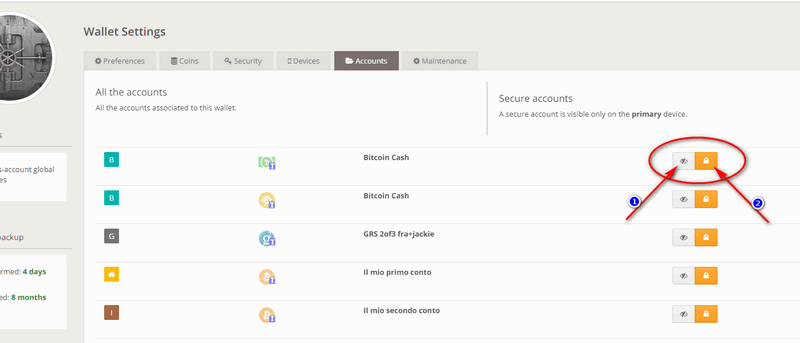
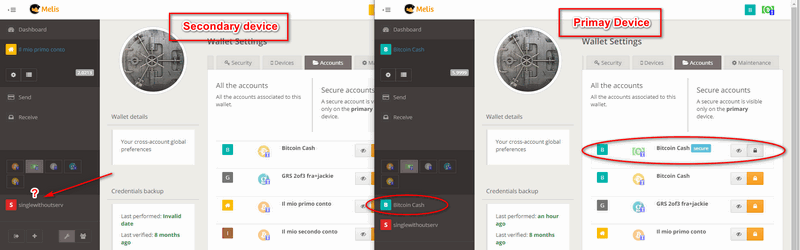
The second button is used to make an account "Secure". Making an account secure means being able to access it only from the primary device and making its existence completely hidden when accessing the wallet from other devices. The typical use of this feature is to have multiple accounts: some hidden where one's savings are kept, and others for daily use. The secure accounts will be accessed by a particular device (i.e. your home PC, or a tablet that is kept hidden specifically for the purpose). In this way, if credentials are found by someone, or if they are extracted by force, it is possible to access only the accounts of daily use where there are limited funds which you can afford to lose; in fact thieves should also know which is the primary device to access and see any hidden accounts.
Don't you find the answer you need?
Click on the "Feedback" button at the bottom left and explain us your problem.